
Most knitters start with flat knitting and work their way to a circular knitting project when they have a little more experience.
Knitting in the round (also known as circular knitting) can seem challenging at first, and you may not know where to begin if you are new to it.
In this guide, we will explain what knitting in the round is, the needles you will need, how to knit, join, and bind off in the round.
What is Knitting in the Round?

Knitting in the round is knitting that creates a tube of fabric. Also called circular knitting, this is the preferred method when you need to make anything with any kind of tube shape. Socks, hats, shirts, sweaters, and other kinds of garments are usually knit in the round to create the tube shape needed.
Knitting in the round is done by joining the cast on stitches to form a circle.
This is different than flat knitting where you are knitting rows. It is much easier to knit anything where you need a tube shape like socks or sleeves in the round, though you could probably knit it flat if you really wanted to.
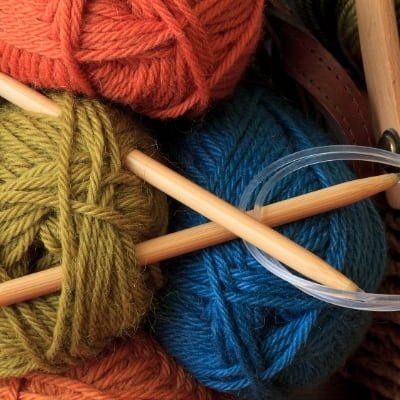
There are a few types of needles you can use for knitting in the round. Circular needles are the most common.
Needles for Knitting in the Round
Circular Knitting Needles
You’ve probably seen the needles that are connected in the middle by a cable and wondered what they are for. Well, those are circular knitting needles, and they are the tool of choice for circular knitting.
These are the best for making even stitches when knitting circular.
What you do is cast on the stitches you need for your project onto the cable.
Circular knitting needles come in a lot of different lengths. The length of the cable matters. The length is measured from the tip of the needle to the other tip.
Generally, you want the length of your circular needles to be just a tad bit shorter than the circumference of whatever you are knitting.
Double Pointed Knitting Needles
Double pointed needles, as the name describes, have two pointed ends. They are usually available in sets that contain 4 or 5 pairs of needles.
These can be used for circular knitting. Typically you will figure out how many stitches you need and place about 1/3 or 1/4 of them on each needle so that you can later join in the round.
If you choose to use this method, it’s important to note that you need to keep one empty needle for knitting the stitches from the first needle. After the stitches from the first needle are knitted, you use that needle for the stitches on the second needle.
Double pointed needles are fine for knitting in the round when you are making anything with a small circumference.
Circular needles are really difficult to use for smaller projects. For most larger projects though, we prefer circular needles. It’s much easier to make neat stitches with these
Straight Needles
Knitting in the round on straight needles is not something that is done very often. Many find it challenging if not impossible. There are ways to do it, but we’re not going to go into too much detail right now with it. We will probably cover it at a later time.
If you’re a beginner stick with circular or double-pointed needles and let’s not make this too complex.
How to Knit in the Round
How to Cast on in the Round
There are two common ways in knitting to cast on in the round: the long tail cast on and knitted cast on. We will cover them both here.
Long Tail Cast On
The long tail cast on is our favorite method for circular needles. If you’re already familiar with this technique for flat knitting, it works very much the same for circular knitting.
To long-tail cast on your circular needles:
- Make a slip-knot
- Slide this knot on one needle and place it in your right hand
- Take your yarn in your left hand
- With your palm facing you, place the tail of the yarn over your left thumb
- Place the working yarn over your left index finger
- Take the tip of your right needle and place it under the yarn on your thumb
- Go under the yarn on your index finger and move back through the loop on your thumb
- Your stitch should now be complete and you can let it go onto your right needle and tighten it
- Repeat this until you have the required number of stitches on your cable
If you’re confused, this helpful video tutorial should help you understand how this is done:
Knitted Cast On
If you’re a beginner, we highly recommend sticking with the long tail method. We find it much easier and it works for almost any type of knitting.
If you do want to learn the knitted cast on though check out this great video:
How to Join in the Round
There are several different ways to join knitting in the round.
Before you begin, it is key to make sure that your cast-on stitches do not have any twisting. That should all be the same way on the needle.
If you see any twisting you will need to take off your stitches and cast them on again.
When you are ready to join in the round, here’s what you do:
- Take the needle with the working yarn in your right hand, the other needle in your left hand
- Bring the tips of the needles together, and insert the tip of the right needle into the first stitch on the left needle
- Make a knit stitch (it is important to note that you should knitting with working yarn)
- Place your stitch marker and continue knitting the next stitch
- Continue knitting until you reach your stitch marker
- Move the marker from your left needle to your right needle. This will let you know you have finished one round
The stitch marker helps you count your rounds which is important. Make sure to keep this count and don’t lose track of where you are.
There are many other methods for joining in the round, this is just one. You can experiment with some of the other variations until you figure out which technique you prefer.
How Do You Join Knitting in the Round Without a Gap?
You have probably seen that a small gap remains between your first and last stitches on your knitting project. But you can fix this with this easy trick.
To join in the round without a gap, you need to cast on an additional stitch to your needle before you knit. Then as you slip your first stitch onto your left needle, take that additional stitch and slip it over your first slip stitch. Then slip the stitch back to your right needle and take your cast on yarn and working yarn and pull them tightly until the stitch cannot be seen.
This will give you a gapless join that looks seamless. Check out this video for more info on this seamless join:
How to Bind Off in the Round
To finish knitting in the round you have to bind off (also called a cast-off). Binding off on circular needles is pretty similar to using straight needles.
To bind off:
- Knit two stitches off your left-handed needle to your right-handed needle
- Start the bind off by taking the first stitch with the tip of your left needle (furthest on the right) and pulling it over the second stitch
- Hold the right stitch over the left stitch and take it off the needle
- You will now have one stitch remaining on the right needle
- Knit another stitch onto the right needle
- Repeat the same process pulling the stitch on the right over the left stitch and taking it off the needle
- Knit another stitch and repeat this process until you get the very last stitch
- At this point cut your yarn and pull through the loop
This should give you a neat bind off when done correctly.
Closing Thoughts
That completes our guide.
There is a lot to circular knitting, but there is a ton of overlap to flat knitting.
Everything is done very much the same.
If you’re a beginner, it’s definitely easier to start with flat knitting, but when you want to make a project where you need circular knitting, don’t be afraid to give it a try. If you find a pattern you like, just start!
Follow the tips and guidelines we have covered here.
Just remember to take your time and don’t get too frustrated. We hope you found this guide helpful!